The Wear-a:bits Project
The Wear-a:bits Project
The first thing to do is decide what your design will look like (you'll cut this out of bits of felt and stick it on with fabric glue). You then need to work out what sort of LEDs you want to add and how to join up all the components in your design so that you can control it with the micro:bit.
You can change the felt background shape (e.g. xmas tree, star, smiley) but the arrangement of the LED sequins or neopixel LED has to be the same as in the diagrams.
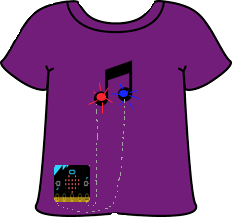
A combination of LEDs, a buzzer and a microbit, connected by lines sewn with conductive thread is called a circuit.
To make things easier, the circuit diagrams are split into three sections.
Choose a circuit from EITHER Part A or Part B, then add the buzzer as show in Part C to get a light-up circuit that plays music!
The main thing to remember about working with conductive thread is that you need to make sure the thread leading from one pin of the microbit never touches the thread coming from another. This will cause a short-circuit and your wearable design won't work until you get rid of any stray threads touching other threads. As the Ghostbusters said: